
Onions (Allium cepa)
Local names in Kenya (Kitungu; Otungu; Esitinguo)
Overview
Onion is a biennial vegetable, but some varieties are grown as annuals. In the tropics the varieties that do well are in effect annuals as they can produce seed within the first year of growing. In general, onions are used for salads bunching onion or sliced full-grown bulbs, marinating e.g. silver skin onions, cooking such as in soups and frying e.g. with meat. Onions are particularly suited to smallholder farming. It also plays an important role in traditional medicine e.g. as a diuretic. Onion is rich in Calcium, Iron, Vitamin B, and Vitamin E and has therapeutic properties. In tropical climate onion can be grown all year-round where irrigation is possible.
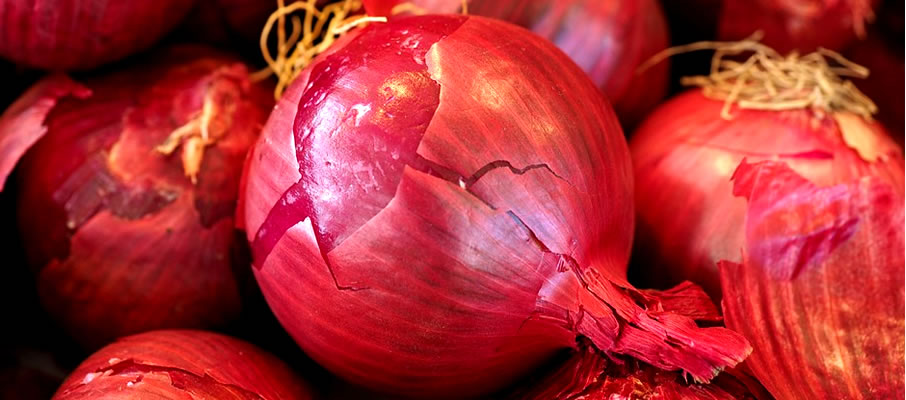
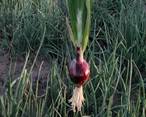
Red bulb onion.
Altitude range
Onion require altitudes of 500-2000 masl
Soil type and conditions
Well-drained, deep, fertile, clayey loam and sandy loam soils with good water holding capacity, away from shade.
It requires a pH of 6.0-7.0 (6.5-6.8) and lime can be applied if the pH is below 5.0. Onion nutrient requirements include: N, P, K, Mg, S, B, Zn, Mo, Mn
Temperature range
The temperatures should be 15 – 30 oC
Rainfall
The rainfall should be 500 – 700 mm p.a
Well distributed and with a dry season prior to harvesting
Steps during land preparation
- Deep plough and rip the land to give room for bulbing and to break hardpan
- Harrow to appropriate tilth just before planting
- Apply well-decomposed manure and mix with the soil, based on soil analysis results
Use clean, disease-free bulbs or sets for planting, from registered agro -input outlets.
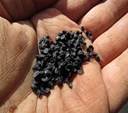
Onion seeds and seedlings
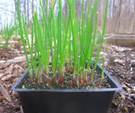
Vegetative stage
Reproductive stage
Available varieties include;
SP 7030NS, Jambar F1, Red creole, Red Pinoy F1, Red passion F1 and Red comet F1
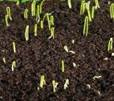
Prepare nursery beds 1 m wide by any desired length
Onion seed bed
Prepare seedbed to appropriate tilth. Can be sunken nursery beds in dry areas flat or raised nursery beds in high rainfall areas and use boxes or trays filled with appropriate rooting media
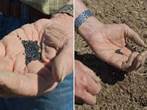
Dress the seeds before planting in the nursery to control fungal diseases
Make drills of 15 cm apart and 5 cm deep; Mix the seeds with dry sand at ratio 1:3. Seed rate: 1-1.5 kg per acre
Sow seeds and cover lightly; irrigate lightly; provide shading or mulch
Seedlings will be ready 6-8 weeks, at pencil thickness
Prune the seedling leaves before transplanting, to harden the seedlings for transplanting
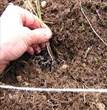
Uproot seedlings only when ready to transplant
Water the nursery bed prior to pulling out the seedlings
Carefully pull out the seedlings to avoid damage
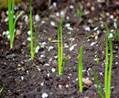
Direct sowing
Direct sowing gives excellent results where the season is sufficiently long to provide early pre-bulbing growth. Direct sowing at rate of 2-4 kg per ha at 30 cm apart
Drill 2.5 cm deep and 30 cm apart across the field
Planting using setts
Bury the onion setts up to only one inch under the soil. Thin after 4-6 weeks 1-1.5 months to 8-10 cm x 30 cm spacing depending on the use for medium sized onions
Planting can be spaced 7.5-8 cm within row. When smaller onions for use in pickling or boiling are desired, spacing can be reduced to 2.5 cm in the row. Larger bulb size is promoted by spacing of 10 cm or more
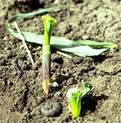
Transplanting
Transplant seedlings at 3-5 true leaves or pencil thickness and 10-15 cm tall, at a spacing 30cm between rows and 8-10 cm between plants for medium-sized bulbs.
Cut off 50 per cent of the green tops to harden the transplant and hasten take off
Water or irrigate immediately after transplanting and regularly until the seedlings get established
Lighter soils need more frequent water applications but less water applied per application
Increase amount of water at the bulbing stage reduce and discontinue watering towards bulb maturity
Stop irrigation 15-20 days prior to harvesting
Hand weeding done 2-3 times depending on the condition of the field
Use inorganic mulch polythene and organic grass mulch or selective herbicides
Top-dress with 300kg per ha CAN or applicable N fertilizer 3-4 weeks after transplanting and same quantity 6 weeks after transplanting based on soil analysis report
Watering should be done immediately after topdressing
Second top-dress fertilizer at 7-8 weeks after transplanting at same rate as first top-dress
Strip or banding method is preferred over broadcasting as it is more effective. Too much nitrogen results in thick necks
Top-dressing should be completed before initiation of bulbing
If the soil is hard, loosen or remove excess soil around the bulbing point to allow bulbs to expand/ develop well. Take care not to damage or expose the roots
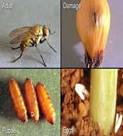
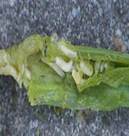
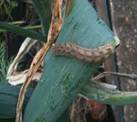
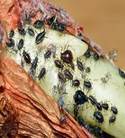
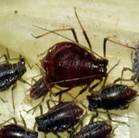
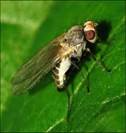
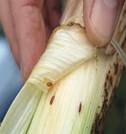
Pests include;
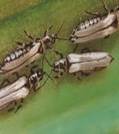
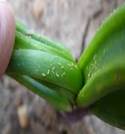
Onion thrips (Thrips tabaci) and Onion fly (Delia antiqua), Cut worms, Aphids, Leaf miners (Liriomyza spp)
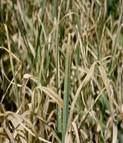
Onion thrips
Thrips thrive in dry conditions, moist plants drive them away. Adult thrips are small 0.5-2.0 mm, slender and winged
Wings are long and narrow and fringed with long hairs Nymphs are white or yellow. Both adult and nymphs feed on the base of the plant within the leaf sheaths
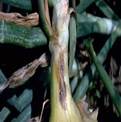
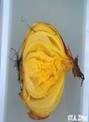
Onion fly maggots
These measure 8 mm long and are white cream in color; They are the most destructive stage of the fly
Cut worms
Aphids
Leaf miners
Pest Control Strategies
IPM and crop rotation
Proper soil management and field sanitation
Rogue infested plants
Weeding and irrigation of water stressed plants that are more susceptible to thrips
Biological control using natural enemies and botanical methods e.g. Neem extracts can be sprayed on plants attacked by onion thrips
Use well decomposed manure or compost S
pray with recommended pesticides
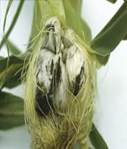
Major diseases include;
Purple blotch (Alternaria porri), Downy mildew (Peronspora destructor), Rust (Puccinia porri), )Onion smuts and Soft rots
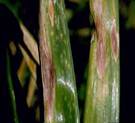
Purple blotch
Downy mildew
Rust

Onion smuts
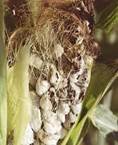
Soft rots


Disease control strategies
IPM and Good agronomic practices e. g. right spacing
Use clean seed or planting materials and varieties tolerant to major diseases
Timely harvest and crop rotation
Spray with suitable fungicides, as recommended/instructed
Field hygiene e.g. destroy infected crop residues
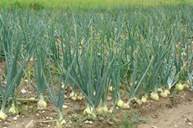
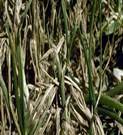
Bulb onions are ready for harvest when: they are 3 months old after transplanting 75% of the tops have turned brown or yellow, fall over and dry
Eaves start to turn yellow and the skin becomes papery around the bulb, foliage wither and form a shiny membrane cover around the bulb, the neck of the onion is dry and tight
The silver skin peels off easily, 50% of the bulb is exposed out of the soil neck falls
The green onions can be harvested during thinning after 45-60 days and used as salads. Harvesting is done when leaves begin to turn yellow and bulbs are firm
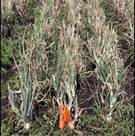
Harvesting is done manually in Kenya during hot and sunny days by levering the bulbs with a fork to loosen them and pulling the tops gently by hand to avoid bruises
To prevent sun scald the bulbs are laid in such a way that the tops of one row is over the bulbs of another, but if the rain occurs, the bulbs should be brought to the curing house immediately
Late harvesting causes excessive sprouting during prolonged storage
Onion will produce 7-10 tons per ha
Store in a clean, dry, cool and well-aerated place
Controlled atmosphere storage is practiced increasingly to extend the marketing period
Well preserved onions can stay up to six months without getting spoilt; although it is advisable to use or sell them as early as possible as they will slowly lose weight
Cleaning is done by removing the soil, foreign matter and badly affected onions manually or by using air
Curing process of drying the necks and leaves of the bulb to ensure maximum quality and increased shelf-life
Cure naturally sun-drying in the field or artificially
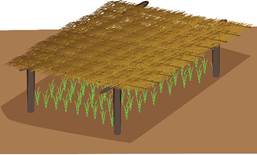
Artificial curing is better because of better process control. Spread the onions on a wire rack in a well-ventilated and shaded area. Put a covering on top of the onions to prevent them from rain
The onions are considered well-dried once the neck is tight the outer skin is dry, makes a rustling sound when handled and the skin colour is uniform. This takes 2 to 3 weeks
Sort to remove the onions with thick necks, the bolted, injured, decayed onions, doubles, small bulbs, bruised, damaged by pests, diseases and sun-scald and sprouted
Trim the onion roots and leaves using a sharp knife and cut 4-6 cm from the bulb
Grade according to colour and size as follows; Grade 1: Big sized onions, Grade 2: Small sized onions and Grade 3: Bulb-lets
Store in a clean, dry, cool and well-aerated place. Controlled atmosphere storage is practiced increasingly to extend the marketing period
Well preserved onions can stay up to six months without getting spoilt; although it is advisable to use or sell them as early as possible as they will slowly lose weight
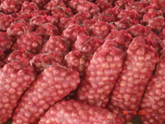
Onions stored in net bags
Package in net bags or crates that allow air movement through the onions
nion buyers include; local traders, brokers, cooperative societies, households, hotels and institutions, and food processing companies